It’s hard to believe that we are already at the end of the semester. The end of my EC&I 834 class means the completion of my Educational Technology and Media Master’s Certificate. Now I am half way in my graduate journey and will continue on to complete my Masters of Education degree. Having the opportunity to participate in the EdTech program with Alec has been an incredible experience. I am so grateful for the online community I have built and for everything I have learned. I know I will leave this experience a better educator and life-long learner.
This semester has allowed me to wrap up my program in a remarkable way. I was able to design and create my own course prototype and share it with my classmates. I have been able to build new connections and hear other perspectives. I have also found so much joy in meeting every week and staying extra long after class just to hang out and share ideas! There have been so many learning opportunities and fulfilling conversations. It’s hard to summarize all of the knowledge I have gained this semester, but it was important to attempt it in the final Summary of Learning.
Catherine and I sought out to create a Summary of Learning that encompassed our experience from not only this semester, but this whole year. Since the pandemic began, we have had to shift our teaching and learning to an online and blended format. There have been a lot of challenges because of that, but also incredible learning opportunities. It was important for us to reenact that in our project. In a timeline format, we used technology tools like FaceTime, Zoom, Flipgrid, and TikTok to display our honest reactions from the year. We called it a “Year in Review” so that everyone could see the progress that has been made with online teaching and learning since schools shut down last spring.
Even though there was a lot of time and planning that went into this project… it still felt seamless and enjoyable. I am so grateful for the opportunity to work with Catherine each semester. We have our project planning and creating down to a science! We planned our project on a shared Google Doc, met over Zoom, and shared most of our ideas with each other through Snapchat. Since we couldn’t physically meet to do our filming, we did everything online. All of our video editing was done on WeVideo through the real-time collaboration feature. The last scene in the video took the longest to edit and create, but it was worth it because it featured our amazing classmates (and a few other special guests).
The biggest take-away from this class, which is displayed in our Summary of Learning, is how valuable community is. None of this learning would be possible without the online community we have built in our classes. As I wrap up my EdTech program, I will always be reminded of the lessons I learned and the experiences I shared with my online community. To each and everyone of you… thank you! I hope you enjoy our final Summary of Learning from this course: “Online and Blended Learning: A Year in Review.”
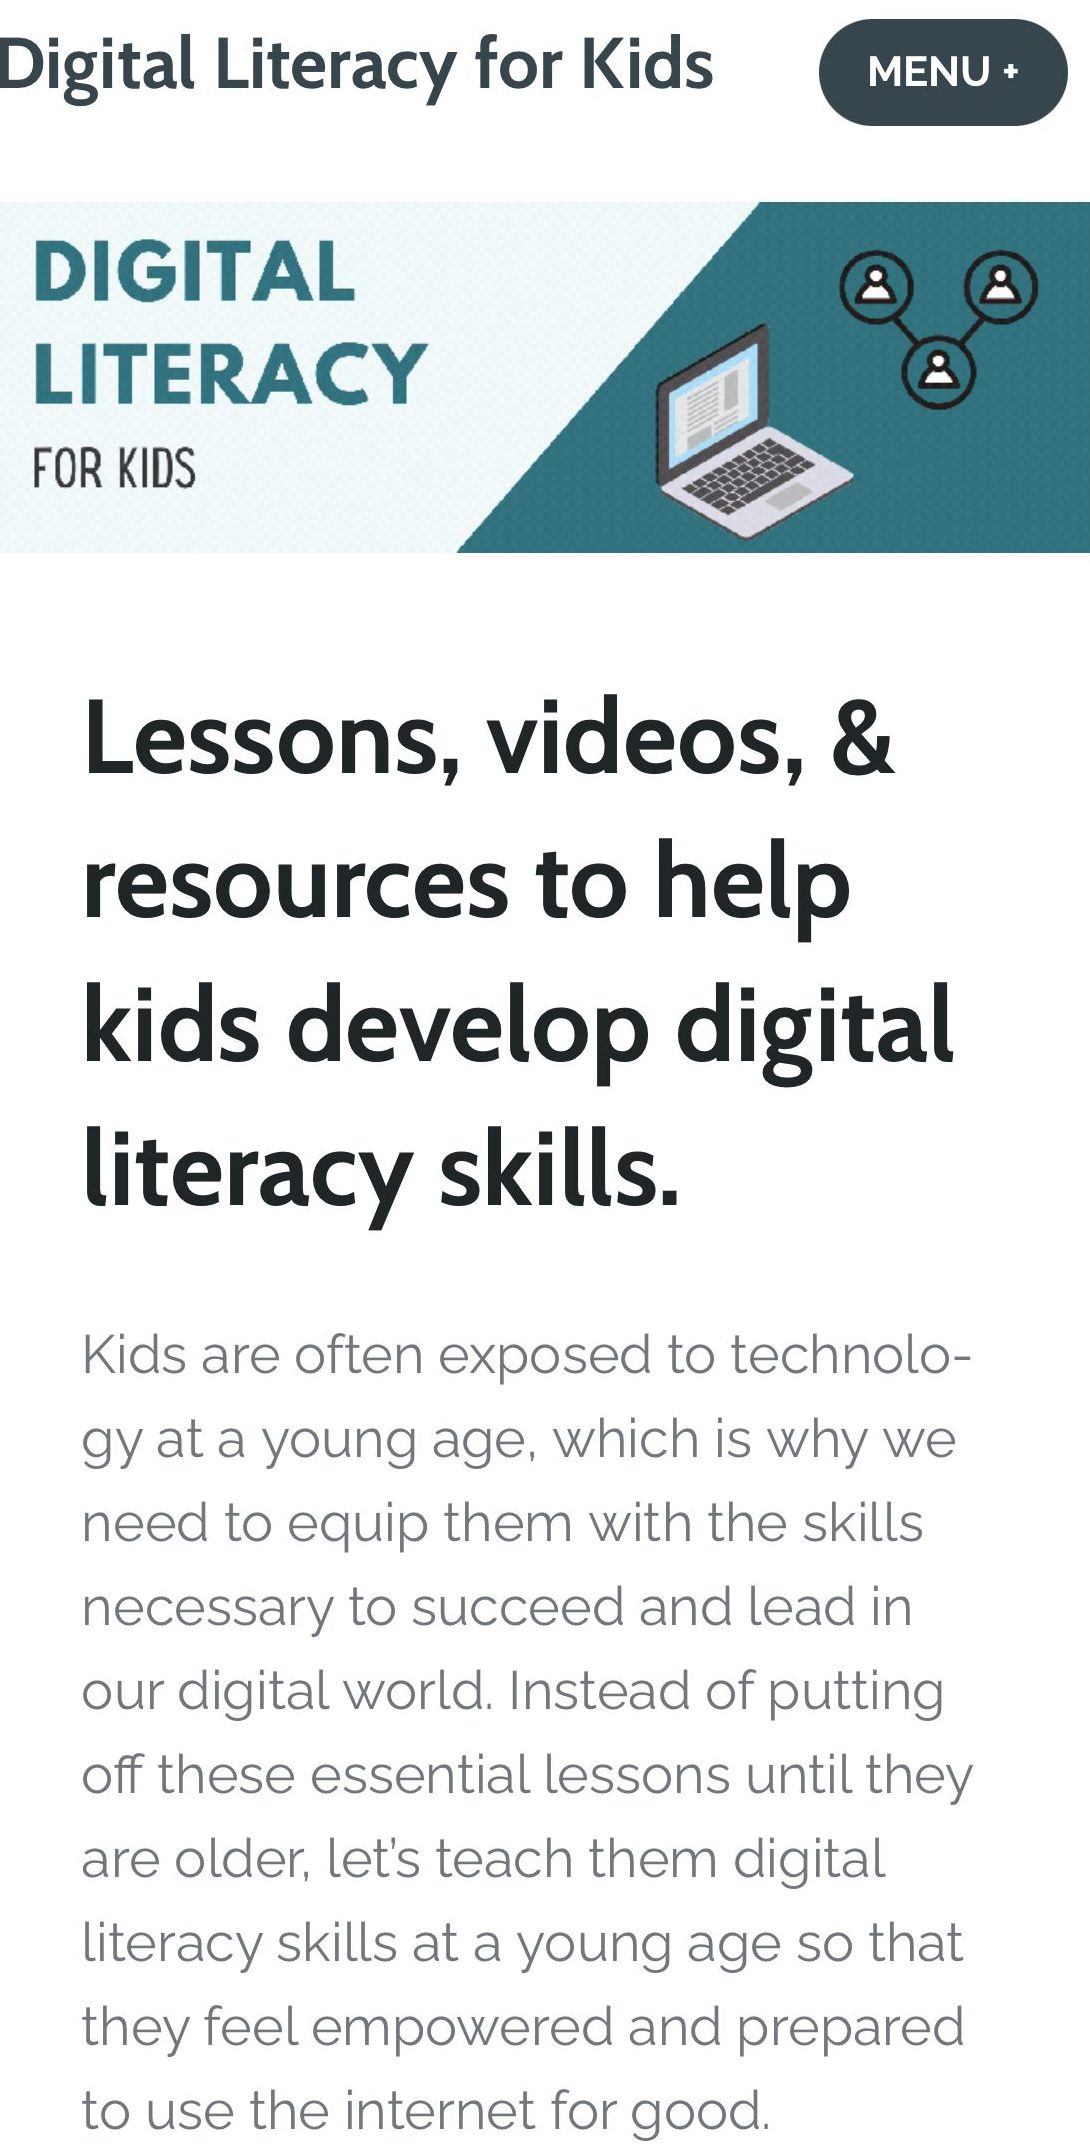
Over the semester, we had the task of planning and initiating lessons within a course prototype. I have to admit… I was unaware of how much work I would put into it, but yet how much I would learn through the process. My plan was to create lessons that helped kids develop digital literacy skills. In my experience teaching grade 2-4, I have always felt that there is a lack of resources in that age range surrounding the topics of digital literacy and digital citizenship. My mission for this assignment was to help bridge that gap.
I decided to create a course that focused on teaching students about digital literacy through engaging and relatable lessons and activities. The first part of the project was to plan our course prototype. I initially thought I would use a Learning Management System to host the content, but the more that I thought about it, I realized that I wanted teachers to have open access to the materials. I quickly changed the plan and decided to develop a website so that teachers could easily gain access to the lessons and activities for their students. You can find the course profile and framework with more of the details here.
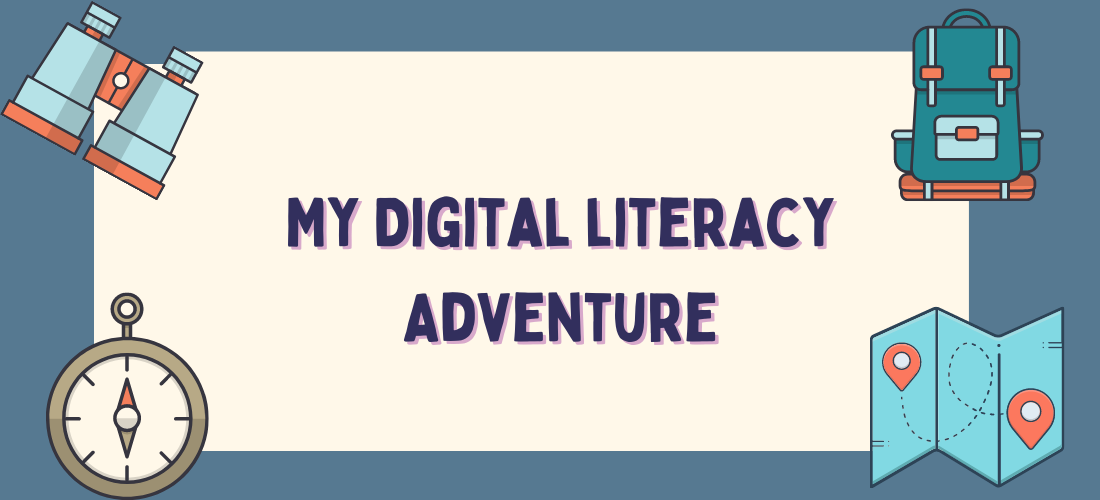
Lesson 1: My Digital Literacy Adventure
My first lesson related digital literacy to an adventure, which can be found here. I thought that since I have created many lessons before, this would be no different. However, a lot more thought and detail goes into planning an online or blended lesson due to all the added elements needed for an online platform. I wanted to create a lesson that was not only engaging, but also accessible and equitable. After creating my first lesson, we had the opportunity to meet in small groups during class and give feedback to each other about our courses. I found this experience extremely beneficial! The advice I received was just what I needed to take my course to the next level. I revised the student self assessment, I added audio to the activity to increase accessibility, and I even implemented a Creative CommonsCopyright on my website. The planning, creating, implementation, and reflection process for lesson 1 can be found here.
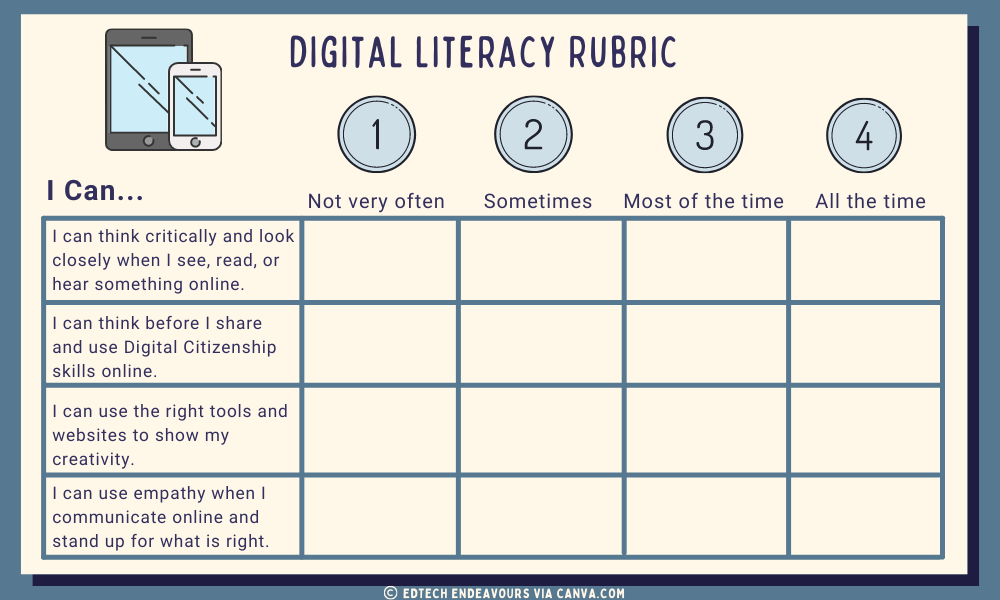
Lesson 2: Look Closely and Think Critically
During the planning and creation of lesson 2, I focused on implementing details in the lesson that I felt were lacking in lesson 1. I felt more confident with the process and had a better idea of how I wanted it to look. For the second lesson, I drew my inspiration from how Common Sense Education displays their digital citizenship curriculum. I included more features like the keywords, the learning outcome, and a full Google Slideshow of the lesson, which I figured out how to embed right into the website. I also challenged myself by creating altered images and fake headlines for the fake news portion of the lesson and had so much fun doing it!
Some other areas I added and took into consideration were:
a one page “quick guide” that teachers can print out and refer to throughout the lesson
a printable or downloadable poster to help students remember the steps they can take to fact-check
an exit slip to wrap up the lesson
assessment and answer keys for each activity
open ended assessment so that teachers can adapt it based on age and grade level
extension activities to deepen understanding
The Conclusion and Continuation of the Digital Literacy Course
This process taught me a lot about lesson creation and creativity. I was more willing to take risks and challenge myself at the end of this project than I was at the beginning. I learned so many valuable lessons and skills through this experience and I know they will serve me well moving forward. The Digital Literacy for Kids website has so much potential for teachers, students, and families. I hope to continue on with this project so that we can help younger students develop digital literacy skills in a tangible, accessible, and engaging way.
You can take a look at my course website here or you can watch the recording below to learn more about it!
Collaboration. We hear that word all the time now, but do we fully understand the meaning or the motivation? It’s encouraged in our workplaces, our classrooms, and communities. When some people hear that word, they roll their eyes and dread the activity that is about to ensue. Other people (myself included) are excited to embark on the collaborative task at hand. Whether you love collaboration or don’t, if it’s not facilitated in a purposeful way, then it can fall flat and add chaos for the people involved.
Oxford defines collaboration as “the action of working with someone to produce or create something.” This definition seems relevant, but broad. In our current digital world, collaboration holds a whole new meaning. Online collaboration needs to allow students the opportunity to work together in a safe, inclusive, engaging, and creative digital space. Dr. John Spencer says “when students are not collaborating with classmates, they miss out on new perspectives, new ideas, and new approaches to solve problems.” Even though collaboration looks different online and adds new challenges, it is vital for successful and meaningful online learning.
There are important ways we can empower our students to dive into the collaborative process so that they are set up for success. Here is a breakdown of Spencer’s “Rules for Improving Student Collaboration,” which still holds true in an online setting as well.
1. Ensure Individual Accountability Each student has something to bring to the table and can contribute to the goal of the task. Encourage them to contribute to the brainstorming process and share their ideas with the group.
2. Empower Teams to Set Norms and Expectations Group members should decide on shared expectations and roles so that there is unison and understanding within the group. The teacher can provide guided support to encourage these team expectations and roles. Students can give feedback to their group members, but requiring them to “grade” one another puts unrealistic expectations on the students.
3. Empower Teams to Own the Project Management Process Encourage students to examine their goals and problem solve together. Spencer says “as students own the process, they develop the skills of collaborative self-management.”
4. Empower Teams to Own the Communication Process Communication is vital when it comes to online collaboration projects. It is important to give students the variety of both synchronous and asynchronous communication tools, as you can see in the Synchronous vs Asynchronous video by Dr. John Spencer.
5. Empowered Teams Still Need Check-Ins It’s important to empower students when they are taking part in online collaboration, but it’s also important to check in with them during the process. Teachers still need to facilitate the learning and guide students along the way.
Just like the collaborative activities in the physical classroom, online collaboration needs structure and guidance. Even though it takes time, practice, and patience to facilitate online collaborative learning, it’s worth it because “opportunities for student collaboration are a key factor in building and maintaining relationships among students and teachers” as Catherine says.
Using Padlet for a Purpose
There are many ways we can facilitate collaborative learning in an online setting. We can use platforms like Google Classroom, Seesaw, Flipgrid, and many more, as you can see in the “Best Student-Collaboration Tools” list from Common Sense Education. Bates reminds us that online collaborative learning can develop skills like “critical thinking, analytical thinking, synthesis, and evaluation, which are key requirements for learners in a digital age.” One of the ways we can encourage meaningful online collaboration and cultivate these digital skills is through online Discussion Boards. It gives students the chance to use the 4 C’s of 21st Century Learning by allowing them to collaborate, communicate, use critical thinking, and fuel creativity.
Recently, I tried out the collaboration tool called “Padlet,” which allows people to use creative tools to share knowledge and information while having the ability to comment and communicate with others. What I didn’t realize about this tool was how adaptable and user friendly it would be. This is the perfect tool to implement into my Digital Literacy for Kids course.
What advice would you give to students who are just beginning their online journey? What should they know about digital literacy/ citizenship? I'd love to hear your thoughts for a project I am working on. Share your ideas on this @padlet! https://t.co/lcHZnn02Th#eci834#digcit
I set up a Padlet to mirror the activity I will teach at the end of my Digital Literacy course. I titled the Padlet “So You Want to Start Your Online Journey…” and asked the questions:
“What would you tell kids who are just beginning their online journey?
“What advice would you give someone who has just started creating their Digital Footprint?”
I made the Padlet public so that when I posted it to Twitter, other people could share their answers and comment on the other responses.
I was impressed with the amount of settings that were available in order to tailor it to the type of activity you want to create. The process of creating the Padlet was simple and straightforward.
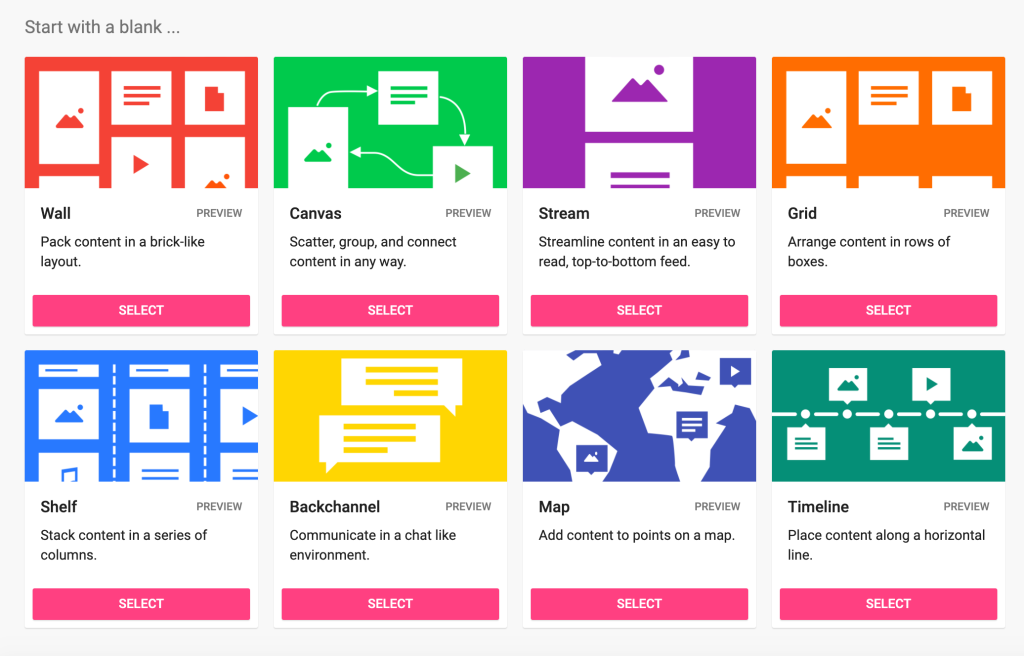
Start with a blank canvas, such as a “wall,” “canvas,” “backchannel,” and so much more.
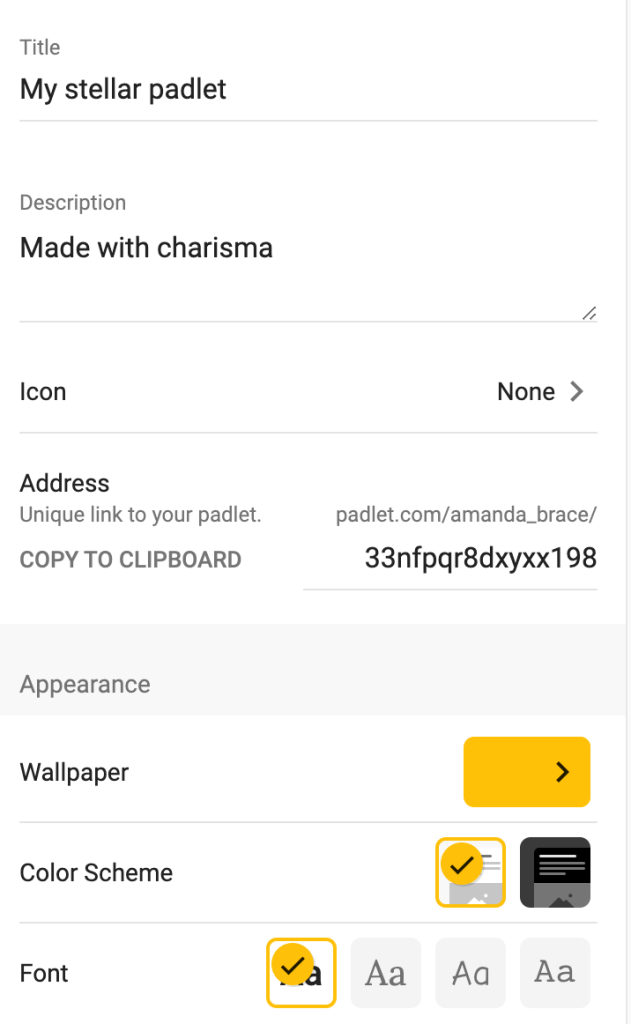
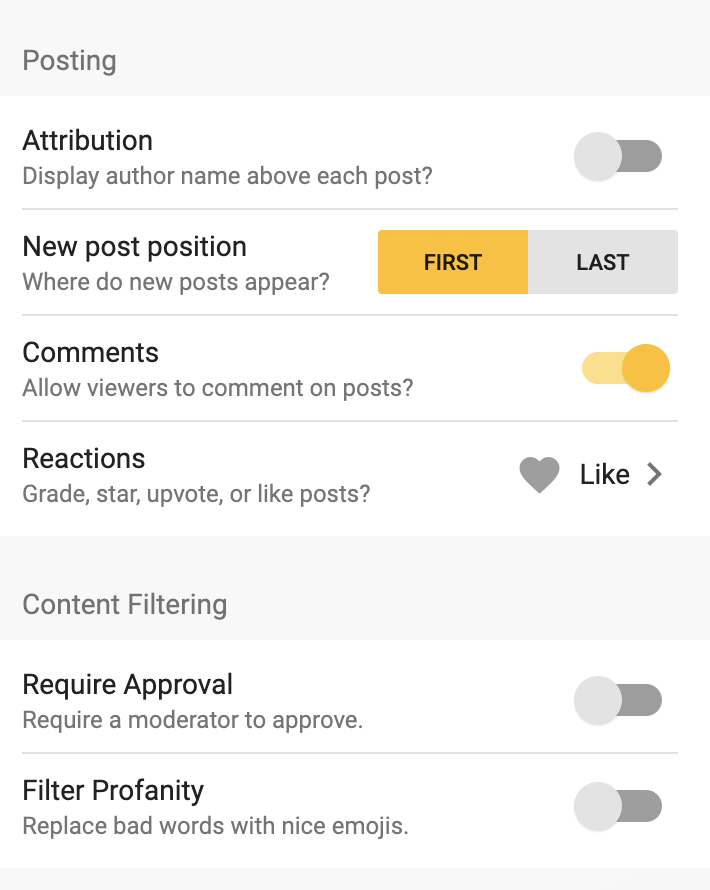
Choose the title, description, and appearance. You can then change the settings of the interactions that can take place. Change the settings to allow comments, comment approvals, likes or stars, and change the privacy settings of the Padlet itself. The ability to change the privacy settings and interaction features allows for more flexibility based on the grade and experience of the students using it.
Once you have your Padlet created, you can share it with a public link, add members privately, embed it into a website, or share it to a platform like Google Classroom. As you can see below, the Padlet I created about digital literacy and digital identity had captivating responses and interaction from people online.
The purpose for my Padlet was to create conversation surrounding digital literacy and digital identity. This activity is something I will incorporate into my Digital Literacy for Kids course. It can be used in so many ways to create discussion and cultivate community. For example, when students finish all of the lessons and activities in the course, they will share their one piece of advice on the Padlet for other kids to learn about digital literacy. It can also teach young students how to comment and interact with each other online in a positive way. With its ability to share photos and videos, students can empower others with images and videos about real vs fake news, social justice and student activism. The list goes on!
It is evident that collaboration can lead to meaning, empowerment, and confidence. It’s important that we encourage these opportunities for our students, especially in an online setting. Once you realize the importance of facilitating an environment of online collaboration for your students, you will realize that the possibilities are endless.
Literacy is multi-faceted, complex, and incredibly powerful. It’s truly embedded into everything we learn and do. It might seem as if literacy is just reading, writing, speaking, and listening, but there is so much more to it. In our current digital world, literacy is also seen through the skills of digital and media literacy. Literacy is all around us.
Since our schools have shifted to blended and online learning in the recent year, it’s evident that literacy skills are often developed in different ways now. Instead of read-alouds happening in a physical classroom, they are happening over a screen. Rather than students writing in their notebooks, they are creating digital stories online. Where there once was students gathered around a table for guided reading groups, they are now meeting in groups to read on a video call.
Many teachers have had to make this change, but are still unsure how to navigate the “balancing act” of balanced literacy in an online environment. With my experience teaching online this year, I have learned a lot of ways we can instil a successful literacy program in a the early elementary online classroom and I’m here to share my findings.
What Does Balanced Literacy Look Like Online?
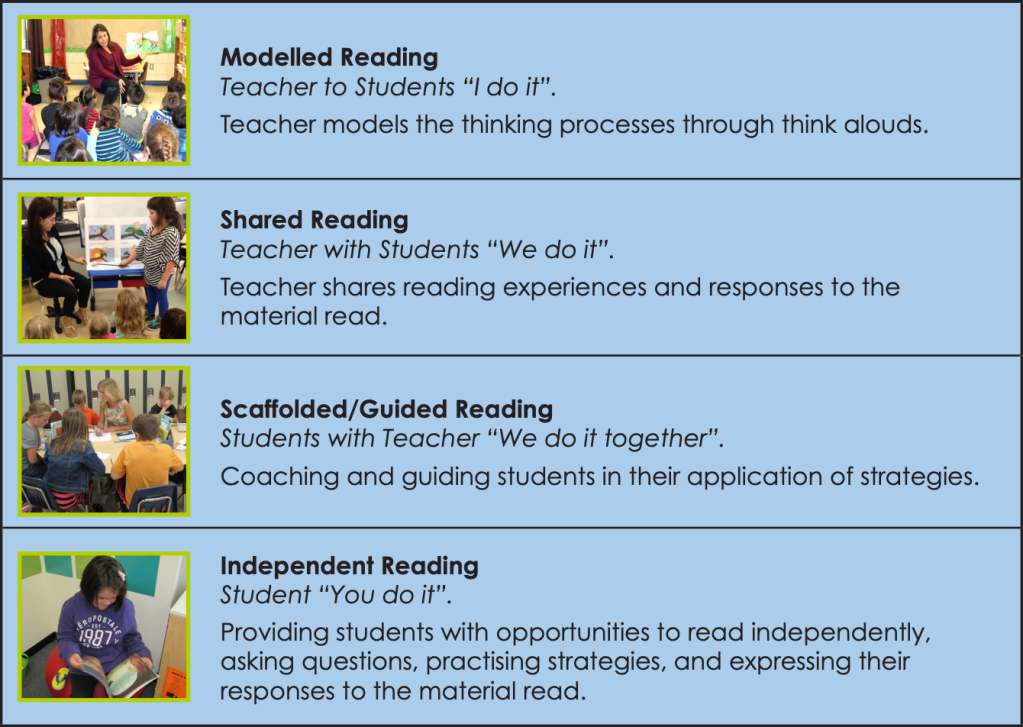
Similar to the physical classroom, literacy needs to be balanced, engaging, and cross circular. Even though it may look different in an online setting, a balanced literacy framework is still essential for students partaking in remote learning. There needs to be differentiated instruction and various opportunities for students to develop their reading and writing skills. In the context of reading, there are many ways it can be facilitated online so that students are engaged and empowered. According to Saskatchewan Reads, the “gradual release of responsibility model” gives students choice in their reading tasks while teachers can still support them and facilitate literacy with cross curricular instruction. Saskatchewan Reads describes four instructional approaches, modelled after the Ontario Early Reading Strategy, which include Modelled Reading, Shared Reading, Scaffolded/ Guided Reading, and Independent Reading.
These four instructional approaches can be facilitated in an online environment so that students can still have choice and control in their learning. Here are some ways they can be embedded into online learning:
Modelled Reading and Shared Reading:
– Model the thinking processes during live class lessons through a video conferencing tool like Zoom or Google Meet. Most publishers permit the use of their books in a live non-recorded setting. Use before, during, and after reading strategies like you would in a physical class setting. During your class meetings, use breakout rooms to cultivate class discussions for your cross circular literacy lessons.
– Use a tool like EdPuzzle to embed before, during, and after reading strategies like you would in a physical class setting. Use high quality YouTube videos or obtain copyright permission to record yourself reading the story. This type of modelled reading is beneficial for an asynchronous learning format.
– Post your own book recordings or YouTube read-alouds to your Learning Management System (LMS) like Google Classroom, Moodle, or Seesaw. Model your thinking by posing a thought or reflection about the story and then ask students to engage in a discussion by posting their thoughts and reflections.
Scaffolded and Guided Reading
– Begin the school year by individually assessing your student’s reading levels during a Zoom or Google Meet. First, use an online booking form so that families can choose a time that works for them. Next, use a sight word assessment guide, like the Dolch word list, to find out roughly what reading level they are at. Paste the words on a Google Slideshow, share your screen for the student to see, and go through the list like you would in a classroom setting. After that, use a platform like Raz Kids, Newsela, or the Fountas and Pinnell Online Resources website to get a better idea of their comprehension skills. Once their reading level is determined, assign them to a virtual guided reading group.
– If students are unable to join the synchronous reading testing session, you can post a reading list to your LMS platform, like Seesaw, and have them record themselves reading the words and answering questions with the recording tool.
– Once your guided reading groups are determined, meet with them consistently like you would in any balanced literacy framework, like Daily 5. Use a platform like Raz Kids, Spark, or Epic to share your screen and facilitate virtual reading groups with before, during, and after readings strategies.
Independent Reading
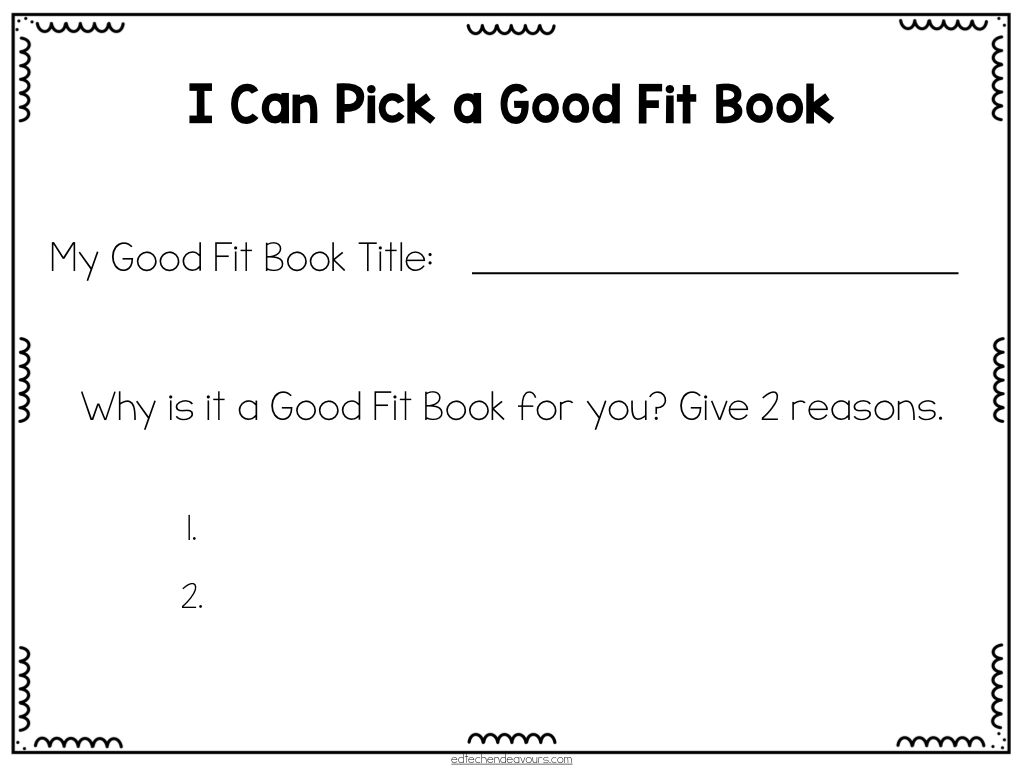
– Start the school year off by slowly introducing independent reading skills, similar to how Daily 5 is facilitated in the classroom. Use online instructional videos to teach lessons like reading “Good Fit Books.” Feel free to download the Good Fit Book slideshow and lesson I created for the online instructional video I posted for the start of the school year.
– Encourage students to read out loud to the family members in their households, friends or relatives over FaceTime, and even their own stuffed animals.
There are many ways to facilitate balanced literacy in an online format, but it is important to find out what works best for your students! It’s also important to remember that balanced literacy needs to be flexible. Guided reading groups are always changing based on your students skills, growth, and interests. The best way to have a successful literacy program is to make sure your students are engaged and having fun.
Choosing Books with Intention
According to the K-12 Saskatchewan Curriculum, there are three Broad Areas of Learning that are instilled not only in English Language Arts, but across every subject area. Each subject in the curriculum encourages students to be lifelong learners, to have a sense of sense of self, community, and place, and to become engaged citizens.
This helps us understand that literacy is more than reading and writing. These areas of learning should be embedded into every subject area, including literacy. If we want to empower our students to be life long learners, have an understanding of self, community, and place, and become engaged citizens, we need to choose books and resources with intention. Even in an online and blended learning format, we need to choose books that are:
Intentional
Inclusive
Impactful
When we choose books and resources for our online classrooms, we need to ask ourselves: Who’s voice is represented?Can students see themselves in the story?Are there biases or stereotypes present? If students are engaging in literacy all around them, let’s use our online classroom as an opportunity to start the critical conversations and spark inspiration. Over the past couple of years, I have become more aware and critical of the books I choose for my classroom…. and now for the virtual classroom. Here are some of my favourite story books for kids that can create critical class discussions. These books also encourage students to become life long learners, engaged citizens, and more aware of their self, community, and place. Click on the titles of each book to find the recorded YouTube versions to use for your online classroom as well.
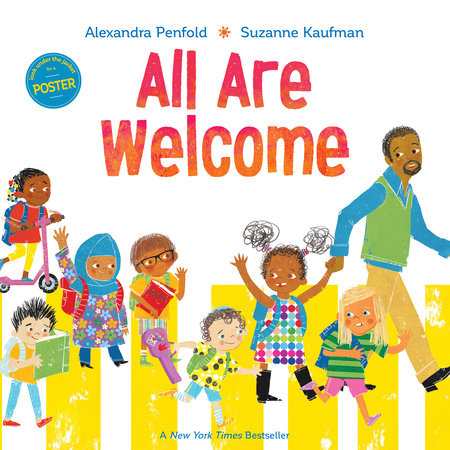
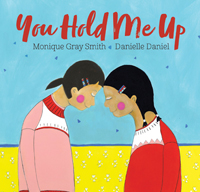
Community
All Are Welcome By: Alexandra Penfold Illustrated by: Suzanne Kaufman
You Hold Me Up By: Monique Gray Smith Illustrated by: Danielle Daniel
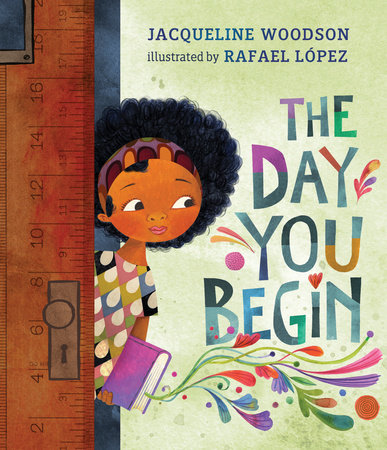
Identity
The Day You Begin By: Jacqueline Woodson Illustrated by: Rafael López
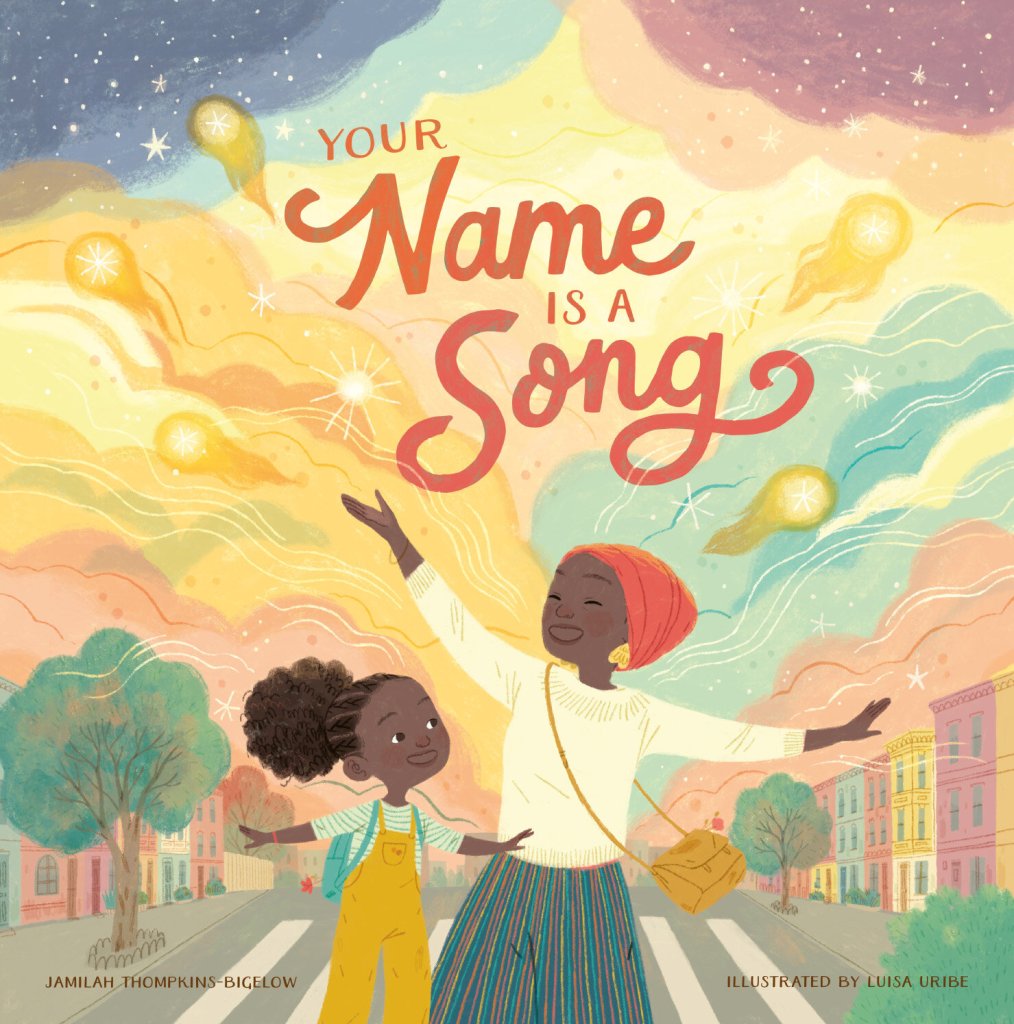
*Your Name is a Song By: Jamilah Thompkins-Bigelow Illustrated by: Luisa Uribe
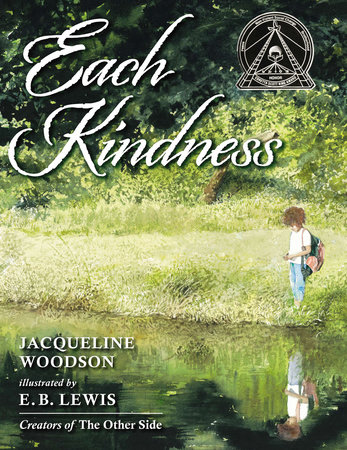
Each Kindness By: Jacqueline Woodson Illustrated by: E.B. Lewis
Social Justice
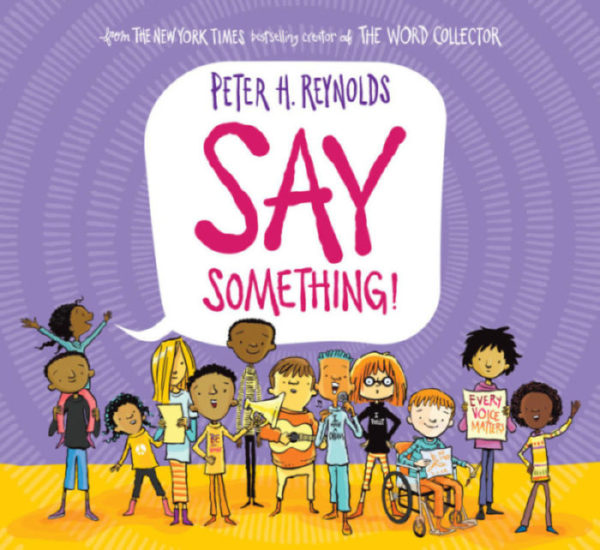
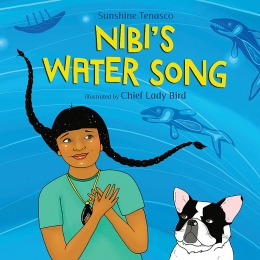
Say Something By: Peter H. Reynolds Illustrated by: Peter H. Reynolds
Nibi’s Water Song By: Sunshine Tenasco Illustrated by: Chief Lady Bird
Common Sense Media also has book lists for various themes and topics. Check out their post called “Books with LGBTQ+ Characters” to find a great list of suggestions.
After looking through my list of suggestions, are there anymore that you would add? Do you know of any other online resources that can help you facilitate reading and writing with your online or blended classroom? I would love to hear your thoughts and continue this important conversation. My hope is that you can use my literacy suggestions and resources to enhance your online classroom and in the end, master the balancing act of balanced literacy.
-Amanda
*The original post had the book “Thunder Boy Jr.” by Sherman Alexie. It was later found out that this author admitted “he ‘has harmed’ others, after rumors and allegations began to circulate about sexual harassment” (NPR, 2018). Raquel Oberkirsch suggested reading an open letter by Debbie Reese, the author of the American Indians in Children’s Literature blog, to learn more about the issue. Having these critical conversations about literature is necessary in order to become more aware and intentional about the books we choose for our classrooms.
There is nothing more valuable than raising a generation of kids who are knowledgeable and experienced in our online world. The only way we can combat misinformation, apathy, and online hate is to instill digital literacy skills in our students…. and that is exactly what I have set out to do.
Digital Literacy for Kids
Our most recent assignment in #eci834 was to start developing an online or blended course prototype. I had the idea to create a course on the topic of digital literacy so that students learn how to succeed in a digital world. After brainstorming, planning, and adjusting… my “course” ending up turning into website called Digital Literacy for Kids. I initially wanted to host my course on a Learning Management System (LMS), as you can read in my initial Course Framework, but I soon changed my plan. With my experience teaching grade 2-4 and my passion for EdTech, I have come to realize that digital literacy resources for kids are challenging to find. I decided that it was more important for all teachers to have access to the lessons and activities than to isolate them using an LMS. In the end, I created a website to curate digital literacy lessons, activities, and resources for educators to openly access online, similar to the concept of Open Educational Resources (OER). I created a WordPress site, bought the domain, and started building my course.
I broke down my website menu into various categories: Course information, which includes my Course Profile and Course Outline, lessons, and resources. For the resources section, I plan on adding a list of other reliable digital literacy resources for people to easily click and access. Each time I create a new lesson about digital literacy, I will add it to the lessons menu category. It’s amazing to see how quickly a website can come together when you have the inspiration to develop a project.
Planning, Creating, and Implementing
My first lesson for my Digital Literacy for Kids website was an introduction lesson to the concept. I designed my lesson around the theme of “adventure” in order to make it more engaging for kids. I always start the beginning of the school year as an adventure theme for my grade 2 and 3 students and they LOVE it. I knew that this concept would be easily enjoyed by primary students. Everything I created for the lesson, such as the instructional video and the resource templates, were all created using Canva. I have the Canva for Education account, so I found that it had everything I needed. I was able to make various types of activity templates, a digital literacy poster, an assessment guide, and an instructional video. Each of these resources were added to my Lesson 1 post on my website. I added the activity pages to the website as downloadable files so that teachers could just click, download, and use. I also created a Seesaw activity and Google Slides template that teachers can copy and distribute. The instructional video had a lot of images and text options to choose from in Canva, however, the animation and song choices were limited. Even though I didn’t have as many content creation options as a paid program like VideoScribe or Powtoon, Canva still gave me what I needed to deliver a successful “adventure” themed instructional video, as you can see below.
Feedback from the Dream Team
In class last week, we had the opportunity to meet in groups, show our courses to each other, and then give constructive feedback. I met with Matt, Erin, and Mike, in other words… the “dream team,” as Matt called it. We had a great time hearing about each other’s courses and having positive discussions. I found it extremely beneficial to have my classmate’s hear my vision and then give me constructive feedback to make it even better. Some of the feedback and advice I was given was:
The website is organized and easy to follow.
The font used for the activities and video lesson are easy to read for kids.
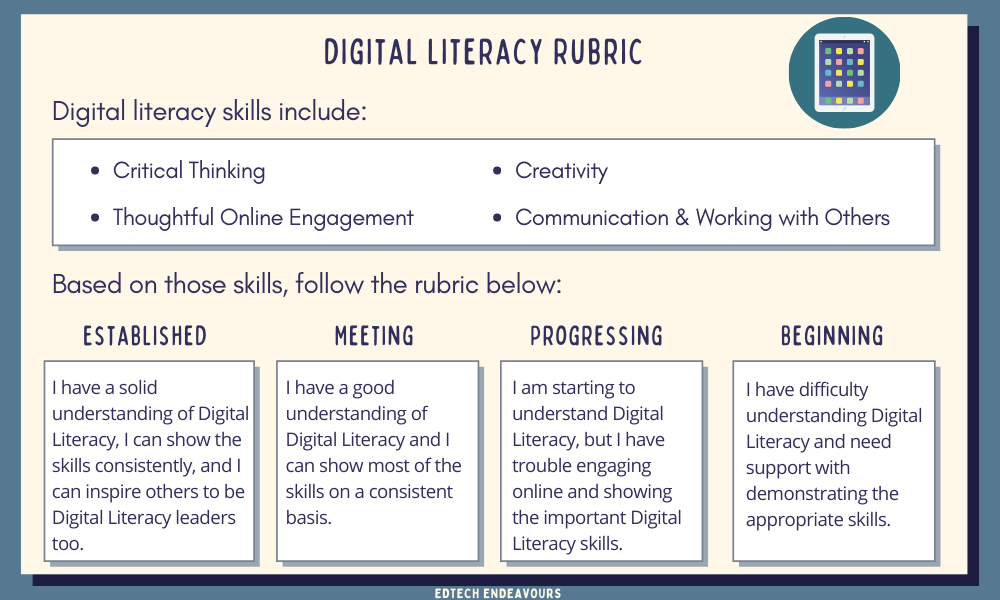
The self assessment rubric is too advanced for young kids. Adapt the rubric so that it’s more “kid friendly.” Break down the word “understand” so that students know exactly what they need to do to reach expectations.
Add audio to the Seesaw activity so that it’s more accessible.
I decided to take each of their suggestions and apply it to my project. I added the audio to the Seesaw activity and created a new self assessment guide for students.
BeforeAfter
After I received my feedback, Alec popped into the breakout room and gave me some feedback as well. He said that I should consider putting a Copyright on my website and resources. He explained how to use Creative Commons in order to make a license for my work… which is much easier than I thought! The steps are as follows:
Choose “yes”, “no”, or “sometimes” when it asks if you want to allow adaptations of your work to be shared.
Click “yes” or “no” when it asks if you want to allow commercial uses of your work.
It will then show you the license you selected and give you an embed code to use for your website.
Next Steps
It is so important to pause and reflect before moving forward in any project. I am grateful for the opportunity to meet with my classmates, share our work, and hear various perspectives. Moving forward, I will keep these considerations in mind when I continue building my course and creating my lessons. So as I move forward with my course design, I’m wondering…
What types of themes or lessons do you want to see in my critical thinking lesson?
After looking at my course so far, is there anymore feedback you have for me?
I am looking forward to hearing your thoughts! Feedback is essential in this process so that we can make our courses the best they can be!
Teaching guided reading online, during a pandemic nonetheless, is a completely different experience than what educators are used to. When schools initially closed down due to COVID-19, many teachers used Epic, Read Works, Newsela, and Raz Kids to facilitate reading online. While all of these resources have an important place in the online classroom, I was still looking for a simple resource that was more specific for guided reading.
Not only is Spark straightforward and easy to understand for teachers, but it is also user friendly for kids. When teachers first log in, they can access their “library,” which includes over 700 titles. They can then search for books based on level, the topic of interest, subject area, genre/text type, and comprehension strategy. The ability to filter and select different books based on levels and strategies is convenient for facilitating guided reading online.
Once teachers have chosen a book, they can either assign it to an individual student, a group of students, or the whole class. The students can then choose the assigned books from their “Book Boxes” or pick a book from the digital library. Teachers can also use books for guided reading with its long list of interactive digital book features and tools.
Benefits of Spark Reading
There are multiple reasons that Spark stands out. Here are some benefits I have come to recognize in just a short amount of time:
1. Audio versions (read by professional actors) are available for each book.
2. There are interactive activities and quizzes during the story, which help with comprehension.
3. Teachers can use the interactive whiteboard feature for guided reading and online instruction. These whiteboard tools include highlighting and drawing, adding text and shapes, and using the “masking” fade tool for highlighting important parts of the page.
4. Teachers can access the student dashboard panel to monitor student progress.
5. Both students and teachers can enlarge the text in the books, which is especially helpful in guided reading when students are reading on a screen.
6. Each book has teacher notes with before, during, and after reading strategies, as well as extension activities that students can even do at home.
8. Students are able to stray from their “Book Boxes” and choose the books they want to read from the vast digital library. The books are colour coded so that students are not distracted by reading levels.
Areas to Consider
When using a new tool or resource, it’s important to review all of it, which includes the potential drawbacks. Here are some areas that need to be considered and will hopefully improve as Spark becomes more developed and widely known.
1. The biggest drawback is the price. It costs money, but if your division or school is willing to purchase it, I would say it’s worth it!
2. Since it is new to the digital library market, there are features that have not come to fruition yet. My hope is that as time goes by, more tools will be added, such as a student audio and video recording tool.
3. Even though there are Indigenous authors included in Spark, it is still only 13% of the whole library. I would like to see more selection with Indigenous books, as well as collections that represent more diversity.
4. The resource is strictly web-based right now, which could interfere with the interactive activities. An easy-to-use Spark app would be beneficial and accessible for both students and teachers.
As you can see, there are many benefits to choosing Spark as your digital library. It’s also important to keep in mind the areas of concern before you or your school division purchases the resource. There is no doubt about it… we need more resources for online and blended learning because it’s not going away anytime soon. Pearson has kept up with the need for this and has quickly developed a functional online library for educators and students. As Spark continues to develop its online library, I am confident that this resource will be a top contender in the online learning world.
Digital literacy. What is it? How can it be achieved? Where do we start?
These are all valid questions that are asked by many of us. Digital literacy encompasses a range of different elements and themes that contribute to our online identities. It also intersects with the topic of media literacy, which is crucial in our world right now. Media Smarts reminds us that “media literacy generally focuses on teaching youth to be critically engaged consumers of media, while digital literacy is more about enabling youth to participate in digital media in wise, safe and ethical ways.”
As we have seen in the past month (or the past 4 years), misinformation is detrimental to our society. As educators, it is our responsibility to encourage our students to be critical thinkers, creators, and consumers. With this in mind, I was inspired to create a course on the topic of digital literacy so that students learn how to succeed in a digital world.
Course Framework
Target Audience: The course will be directed towards grade 2-4 students in a face-to-face, virtual, or blended setting.
Course Timeline: The course will focus on 5-6 main themes of digital and media literacy. Each theme will have a video lesson and activity. There will also be conclusion lesson to wrap up the course. The course can be done within a 6 week time frame with one lesson a week.
Course Delivery: This course can be delivered through an asynchronous learning format or in a blended model that involves face-to-face instruction and online learning in the classroom. The instructional videos for each course will be accessible on YouTube or within the course. The lessons will have both independent and collaborative activities that can be accessed online through Google Slides or Seesaw.
In the Digital Citizenship Guide, digital literacy is referred to as “searching for information, evaluating the content of websites, collaborating in networks, and organizing the abundance of information available online.” These skills will be the focus of the course. It’s also important to recognize that digital literacy includes social responsibility, empowerment, and awareness. Media Smarts, Common Sense Education, and Teaching Tolerance are all incredible resources I will refer to when including these critical aspects of the course.
The Learning Outcomes for the course will also fall under the Saskatchewan Curriculum. Both English Language Arts and Health have outcomes and indicators that point to digital literacy. Each outcome can be achieved online, which in turn develops digital literacy skills.
For example, the grade 3 outcome CC3. 1says, “Comprehend and respond to a variety of grade-level texts that address identity, community, social responsibility and make comparisons with personal experiences.” These “texts” can be online articles, tweets, or blog posts. When students are developing their digital literacy skills, they are building their digital identity, learning how to thrive in an online community, and understanding the empowerment of online social responsibility.
The ELA outcomes for composing and creating allow students to remix and create online artifacts. The Health outcomes talk about online safety and etiquette, which is a big part of digital literacy. As you can see, there are many ways to incorporate online skills into the curriculum in order to meet the objectives.
Course Materials: The course can be accessed online with internet and a device or computer. Each activity is done in an online format, but with the option to be printed.
Special Considerations: The purpose of this course is to enhance the digital literacy skills and abilities of younger students so that they know how to thrive in a digital age. In order to achieve these skills, the learning in this course needs to be accessible to everyone, no matter the circumstances! Here are some areas of consideration for this course:
The outcomes in this course can be achieved in various ways so that it meets the needs of every child. Students will have choice in their learning.
Every instructional video will have Closed Captioning.
If students are unable to access the video portion of the lesson, for reasons such as low bandwidth, there will be “Summary Points” to review the important themes in the lesson.
Each activity will be digital, but will also have the option to be printed. If students do not have access to a device or computer, their teacher or learning mentor can print out the materials for them.
The Digital Divide is an obvious reality in our world right now. In order to help students with this, there are libraries throughout the city that are open for anyone who needs computer and internet access. They also have programming that can assist students with their learning in a socially distanced and safe way. This information will be accessible within the course.
Activity Completion and Assessment: The course modules will be within a Learning Management System (LMS), but the video lessons will also be uploaded to YouTube. The activities for each lesson will be available within the LMS, Google Slides, and Seesaw. Students need to accomplish the lessons in order so that they have the necessary background knowledge for each lesson. There will be formative and summative assessments for the course, with a digital literacy completion certificate at the end.
The course is still in the “making”, but I have no doubt that it will evolve and adapt as the weeks go on. I’m wondering… is there anything you wish you would have known about the digital world when you were a kid? What do you think is essential for students to know about their digital identities? I am looking forward to hearing your feedback and I am excited to see the course take shape! Join me on this journey and let’s dive into digital literacy together!
“Can you hear me okay? Is my mic on?” “I’m just gonna share my screen real quick.” “Please mute your mic…. nope you’re still not muted.” “Thanks for introducing me to all of your pets… again.”
If you are a teacher, you have probably said or heard these words more than once since the pandemic started. Everyone has had to shift their teaching styles and dive into the online world in some way since COVID-19 began. Some teachers have moved completely to an online learning environment and others have added digital elements to their physical classroom. These changes are easy for some, but much more challenging for others.
My teaching experience has varied over the years, but I have always implemented Educational Technology in some way. I have always used the blended learning model to some extent in my classroom, which is the blend of both online learning and face to face instruction. I have improved and altered the way I use blended learning as I have become more comfortable with it. The part that makes blended learning stand out is that “it requires the physical presence of both teacher and student, with some elements of student control over time, place, path, or pace.”
When I first started teaching, I was ambitious and used online learning in any way that I could. If there was a new website or app, I was always willing to try it in my classroom. This mindset is what guided a lot of my instruction and teaching methods. Even if my school had a limited amount of devices, I would intentionally implement the blended learning model within small group rotations or inquiry. However, the part of blended learning that was lacking in my classroom was the “student control over time, place, path, or pace.” This reminds me more of the Modern Classrooms Project framework of learning, which starts with blended instruction, moves into self-paced structure, and then allows students to progress when they demonstrate mastery. Trevor reminds us “it’s largely about choice and giving many options for students to express their learning” with a blended learning model.
Kareem Farah says that “when we micromanage the learning environment, we do a disservice to our students. We strip them of the opportunity to become self-regulated and self aware young adults. It may be intimidating to release control, but it is profoundly important.”
When we micromanage the learning environment, we do a disservice to our students. We strip them of the opportunity to become self-regulated and self-aware young adults. It may be intimidating to release control, but it is profoundly important.
The freedom for students to choose their place, path, and pace in learning also reminds me of my current experience with online teaching. With the current online school that I work at, students are able to work at an asynchronous pace, but still get the benefits of meeting their teachers and classmates in a synchronous environment. Just like a blended learning format, students need the opportunity to build community with their peers, but also have time for their own learning and discovery. The blend of asynchronous and synchronous learning is essential for a successful online learning environment.
After working in an online learning environment for the past 5 months, as well as integrating blended learning into my classroom for the past 6 years, I have come to recognize the benefits and challenges of both these models. Since I am currently working with an online learning model, I decided to make a list of what I believe is essential for a thriving online learning environment and the areas we need to consider.
1. Student Centered Lessons: Just like any form of teaching, it needs to be student centered. Keep the students at the center of the conversations that surround their learning and make sure each activity and assignment is possible for them in their current online learning situation.
2. Asynchronous Learning: Use asynchronous learning for video instruction, assignments and projects. This allows students to work at their own pace and learn in an atmosphere that benefits them. It’s also important that the assigned lessons and activities are achievable. If they cannot be done independently, then there needs to be planned synchronous time to answer questions and support students.
3.Synchronous Learning: Synchronous opportunities are needed for building community and having conversations from various perspectives. Students still need these opportunities to recognize their own biases, learn from their peers, and feel heard. Students should leave these meetings feeling celebrated, known, and confident.
4. Instructional Videos: Instructional videos are a great way to keep learners engaged. Keep them short and concise, use Closed Captioning, and save it to a platform or in a video format that each child can access.
5. Asynchronous Assessment: While informal/formative assessment can be done in a synchronous format, summative assessment should be administered in an asynchronous way. Students who are unable to attend meetings or don’t have the necessary technology should still be fairly included in the assessments.
6. Professional Development: Training and Professional Development is crucial for educators who embark on the journey of online teaching. Teachers need to know how to use the technology and online platforms. It’s also important that teachers understand the importance of the 9 Elements of Digital Citizenship, which includes digital security and privacy.
7. Communication: Building relationships with families and caregivers is incredibly valuable with online learning. It makes all the difference when you make space and time for families to ask questions and share their input. Having synchronous information meetings or inviting families to send emails allows them to be a part of the learning process. Remember to use your e-portfolios or online learning platforms to share positive experiences and personal encouragement with families.
8: Accessibility and Equity: Online learning needs to be accessible and equitable. There are many obstacles that stand in the way of online learning, such as the Digital Divide. Students might not have access to the internet, they may not have a device, their software could be outdated, or there could be multiple siblings who need to share one device during a synchronous activity. These are challenges that many families face during online learning, so it’s important that your school has strategies in place to support and provide access for the students and families.
As you can see, there are many elements to consider if you are moving to an online or blended learning format. I am sure that as the year goes on, I will have many more points to add to this list. So I am wondering… if you have taught in an online or blended learning environment, what are some things you would add to this list? What are some of the challenges you have faced or experiences you have celebrated?
It’s important to remember that whether you are using a blended learning or online learning format, it needs to be intentional, authentic, and student centered. The best part about any kind of teaching is that we learn, adapt, grow, and improve- just as our students do. If you are starting to embark on this online or blended learning journey, remember to have fun, be flexible, and connect with others who are experiencing it as well.
Another semester is upon us, and I can’t believe it’s already my 5th graduate class. Once this class is over, I will have successfully completed my Master’s Certificate in Educational Technology and Digital Media and will continue classes to finish a Master of Education degree in Curriculum and Instruction. My current graduate course is called Online and Blended Learning. I have been immersed in this topic since the pandemic began, but my understanding of it has evolved over the past 9 months.
A Photo from Emergency Remote Teaching in the Spring
When schools had to close down last spring, teachers had to suddenly begin Emergency Remote Teaching (ERT), which is significantly different than Online or Blended Learning. In an online post called, “The Difference Between Emergency Remote Teaching and Online Learning“, they explain that ERT is “a temporary shift of instructional delivery to an alternate delivery mode due to crisis circumstances.” As we have experienced first hand this year, moving to online format during a pandemic is very complex. Students, families, and teachers are dealing with trauma and multifaceted issues. It’s hard to prepare and adapt to an online learning model when it’s forced, rather than developed over time. However, it is important to remember that even after this time in history, Online and Blended Learning is here to stay.
After we experienced Emergency Remote Teaching in the spring, I was given the opportunity to teach at the online school with my division in September. I was able to use the skills that I gained during my Emergency Remote Teaching and the knowledge I gained in my EdTech classes to enhance the online education for my students. I created instructional videos, facilitated synchronous classes, and planned asynchronous activities in a purposeful way. I soon moved into a new position that allowed me to support other teachers, students, and families with technology and online instruction, which is the role that I am currently in. My love for online learning has given me so many opportunities in just a short amount of time, which is why I am so excited about this semester of learning.
Even though I have gained a lot of experience with Online and Blended Learning this year, I still have so much to learn. My desire is to become more knowledgable about Online Learning as a whole. I have 3 goals that I want to accomplish this semester, but I know these goals will continue throughout my education career.
1. I want to develop an online course that can be used by both students and teachers, that is easy to navigate, and engaging to learn. My hope is that it can be used beyond this class to help other educators and students.
2. Another goal that I have is to gain more insight into the most effective models for Online and Blended Learning. Keeping up with the weekly reading materials, reading my classmates blog posts, and engaging with tweets and articles on Twitter will help me with this goal.
3. For my last goal, I want to know more about the social, economical, and ethical concerns with Online and Blended Learning. I have learned a lot about the barriers that stand in the way of Online Learning, but I also want to develop strategies to overcome some of these problems.
These goals can not be easily accomplished within 4 months, but I am determined to grow and learn in each of these areas. I am confident that each of my classmates will have an important role in my growth this semester and I am looking forward to being a part of their journeys as well. Looking back, I never realized how rewarding and engaging this Master’s journey would be. I have learned so much and feel even more passionate about EdTech than when I started. Even though I am nearing the end of my Master’s Certificate program, I am still looking forward to the new semester and all the learning opportunities it will bring.